
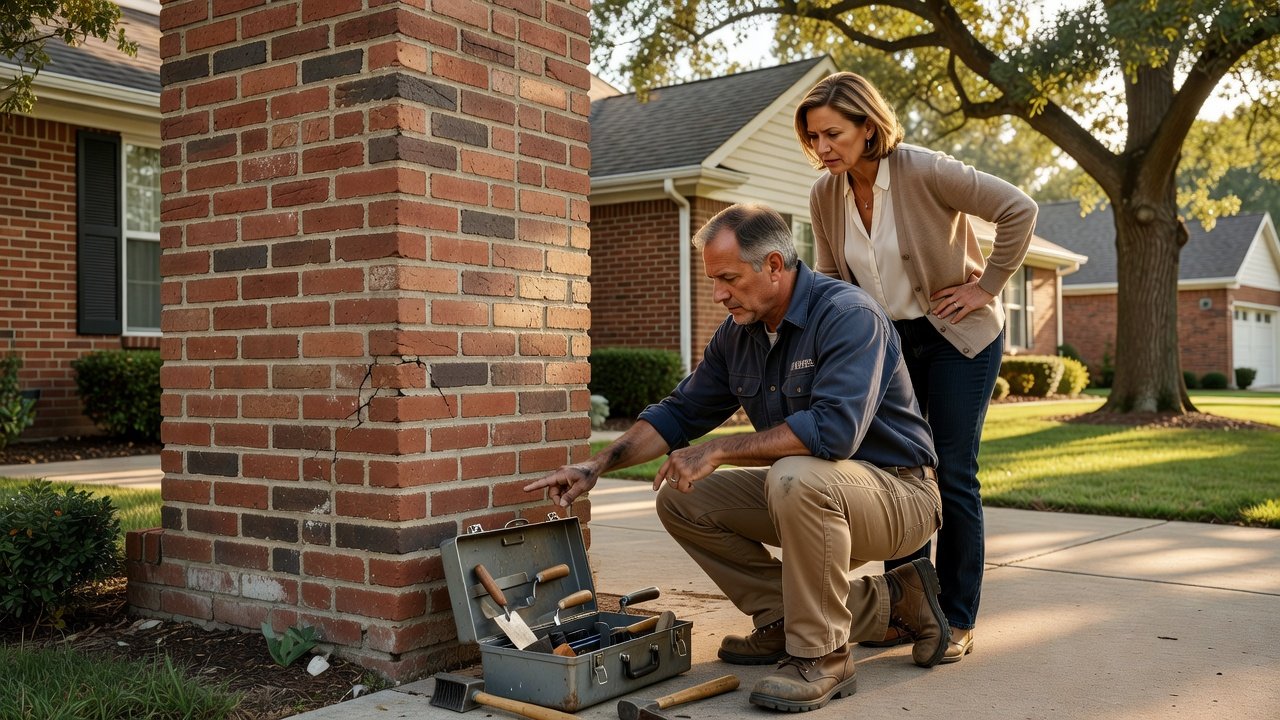
How to Hire a Chimney Masonry Repair Contractor in Deer Park NY Without Wasting Money
Chimney masonry problems rarely become obvious all at once. Crumbling mortar, cracked bricks, water intrusion, and damaged crowns can develop gradually before a homeowner realizes that repairs are needed. The biggest mistakes often happen before the work begins. Choosing the wrong contractor, approving an unclear scope, or using incompatible repair materials can make an existing masonry problem worse.
For homeowners in Deer Park, Central Islip, and nearby Suffolk County communities, the goal should be simple. Identify the actual problem, understand the proposed repair, verify the contractor, and get the scope in writing before work starts.
Before You Start Chimney Masonry Repair
Chimney masonry repair is not simply a matter of filling visible cracks. The appropriate repair depends on the condition of the brick, mortar, crown, flashing, chimney structure, and other components.
Mortar compatibility is particularly important when working with older masonry. The National Park Service explains that repointing mortar should be selected based on factors such as the existing masonry, site conditions, weather exposure, and the intended function of the new mortar. A mortar that is harder or less permeable than the surrounding brick can contribute to masonry deterioration.
That means homeowners should be cautious about contractors who automatically recommend one mortar type for every chimney. The correct material should be selected after evaluating the existing masonry.
Step 1: Document What You Can See
Before a contractor arrives, take photographs of the chimney from safe locations.
Look for:
- Cracked or broken bricks
- Crumbling mortar joints
- White staining or efflorescence
- Areas where brick faces are flaking
- Loose masonry
- Visible cracks in the crown
- Damaged chimney caps
- Signs of water intrusion
- Separation around flashing
Do not climb onto the roof simply to get better photographs. A second-floor window or ground-level view may provide enough information for the initial conversation.
The goal is not to diagnose the chimney yourself. It is to document what you noticed so the contractor can investigate the actual condition.
Step 2: Get an Appropriate Inspection Before Major Repairs
A visible masonry problem does not automatically mean that the entire chimney requires extensive reconstruction. Before approving major work, ask the contractor to explain what was inspected and how the recommended repair was determined.
A Level 2 inspection may be appropriate when circumstances call for a more detailed evaluation. It should not, however, be presented as automatically required for every masonry repair.
The inspection level depends on the condition of the chimney, changes to the system, and other relevant circumstances. If the contractor recommends a camera inspection, ask what the camera is being used to evaluate.
CSIA guidance recognizes internal video inspection as an important diagnostic tool in situations where the interior condition of the chimney needs to be evaluated. After a chimney fire, for example, CSIA specifically recommends an internal video inspection after sweeping to check flue tiles, mortar joints, and other components.
For ordinary masonry deterioration, the exterior condition may be a major part of the assessment. The inspection should be appropriate to the actual problem rather than automatically applying the most extensive inspection to every project.
Step 3: Understand What Repointing or Tuckpointing Covers
Repointing involves removing deteriorated mortar from masonry joints and replacing it with new compatible mortar. The National Park Service describes repointing as removing deteriorated mortar and replacing it while matching the original joint profile and masonry characteristics as appropriate.
There is no single depth that applies to every chimney. The amount of mortar removed depends on the condition of the existing joints and the requirements of the repair.
Repointing also does not automatically repair every masonry problem.
Ask whether your estimate includes:
- Mortar joint repair
- Brick replacement
- Crown repair
- Chimney cap repair or replacement
- Flashing work
- Waterproofing
- Structural reconstruction
- Interior flue or liner work
Get the scope in writing. A proposal that simply says “chimney repair” does not tell you enough about what the contractor is actually agreeing to do.
Step 4: Ask How the Mortar Will Be Matched
Mortar selection deserves more attention than many homeowners realize.
The National Park Service recommends evaluating the existing mortar’s physical and visual characteristics when selecting replacement mortar for masonry. Factors include strength, permeability, composition, color, texture, and the characteristics of the surrounding brick or stone.
The goal is not simply to choose the strongest available mortar. A mortar that is harder than the surrounding historic brick can cause the masonry units to deteriorate because moisture and movement are handled differently.
Ask the contractor:
What mortar are you proposing?
How did you determine that it is compatible with the existing brick?
Will you match the existing color and joint profile?
Do you recommend a mortar sample or analysis?
For older or historically significant masonry, mortar analysis may be appropriate. The National Park Service’s preservation specialists note that mortar sampling can help determine composition, hardness, permeability, and pigmentation before repointing work.
Step 5: Confirm Permit Requirements Before Work Begins
Do not assume that chimney masonry work is automatically exempt from permitting.
The Town of Babylon’s current building-permit materials specifically list chimney and fireplace among permit types. The town also states that structural home repairs require a building permit.
The exact requirements depend on the work being performed. Before construction begins, ask the contractor whether a permit is required and who will obtain it.
You can also verify the requirement directly with the Town of Babylon Building Division rather than relying solely on a contractor’s statement.
This is particularly important when the work involves structural reconstruction, alterations, or other changes beyond routine maintenance.
Step 6: Ask How the Repair Will Be Protected During and After Installation
Masonry repairs can be affected by weather and site conditions.
Ask the contractor how the repair will be handled if rain, extreme temperatures, or other conditions affect the work. Do not rely on a single universal curing temperature or timeline because appropriate procedures depend on the mortar system, weather, exposure, and manufacturer’s requirements.
The National Park Service notes that mortar can fail if it dries too quickly and that proper curing practices are important, particularly with lime-based materials.
A professional should be able to explain how the selected mortar will be protected during installation and curing.
Step 7: Review the Finished Work Before Final Payment
Before signing off on the project, compare the finished work with the written scope.
Check that:
- The agreed mortar joints were repaired
- Replacement bricks were installed where specified
- Joint profiles are consistent
- New materials are reasonably matched to the existing masonry
- Crown or cap work was completed if included
- Flashing work was completed if included
- Debris was removed from the work area
Ask for photographs of completed areas when portions of the work are difficult to see from the ground.
Keep your contract, estimate, photographs, permit documentation, material information, and warranty paperwork together. These records can be useful if you need future repairs or want to document the work when selling the property.
What If the Cracks Come Back?
New cracking after masonry work does not automatically prove that the contractor used the wrong mortar.
Recurring cracks can have multiple causes. They may be related to continued water intrusion, movement, underlying structural conditions, incompatible materials, installation problems, or an issue that was not addressed during the original repair.
Do not simply cover a recurring crack with another layer of mortar. Ask for the cause to be evaluated.
The National Park Service emphasizes that the source and nature of masonry deterioration should be determined before selecting the repair. Structural problems should be addressed before cosmetic repointing.
How to Compare Chimney Masonry Repair Contractors
When comparing contractors in Deer Park and Central Islip, look beyond the lowest estimate.
Ask each contractor to provide:
- A description of the observed problem
- The proposed repair method
- The areas included in the repair
- The proposed mortar or masonry materials
- Any recommended inspection
- Permit responsibilities
- Estimated project schedule
- Payment terms
- Warranty information
- Proof of appropriate insurance
Compare the scope rather than simply comparing the final price.
A lower estimate may cover only repointing while another contractor’s proposal may include brick replacement, crown work, or additional inspection. Those are not equivalent services.
Warning Signs of a Poor Contractor
Be cautious if a contractor:
- Cannot explain what caused the masonry deterioration
- Recommends major reconstruction without documenting the problem
- Refuses to provide a written scope
- Cannot explain the proposed mortar
- Tells you permits are never required without checking the local requirements
- Pressures you to approve extensive work immediately
- Provides a vague estimate that combines unrelated repairs
- Refuses to explain who is responsible for obtaining required permits
For significant masonry work, getting another professional opinion can be worthwhile if the diagnosis or proposed repair is unclear.
The Bottom Line for Deer Park Homeowners
Chimney masonry repair should start with diagnosis, not demolition.
If you see cracked bricks, deteriorated mortar, efflorescence, crown damage, or other signs of deterioration, have the chimney evaluated by a qualified professional. Ask what caused the problem, what portion of the chimney needs repair, what materials will be used, and whether permits apply.
For older masonry, mortar compatibility deserves particular attention. The National Park Service recommends matching the properties of replacement mortar to the existing masonry rather than assuming that a stronger mortar is automatically better.
Take your time before approving major work. A clear diagnosis, detailed proposal, appropriate materials, and proper permitting can help you avoid paying for repairs that do not address the underlying problem.
Related from Deer Park Chimney NY: Chimney Repair in Deer Park, NY · Chimney Repair in Deer Park — What It Costs, What It Fixes, and Who Do